Heard of cupping before, but not quite sure where to start?
Maybe you've even been to a group cupping event somewhere and want to recreate it at home?
This post is for you!
Today, we're going to break down how to easily set up a fun coffee cupping experience at home.
So here we go...
How to set up a coffee cupping at home
Cupping coffee at home is easy, and a really fun way to explore a coffee.
If you're just trying out a new coffee for the first time, or if you have limited amounts of a coffee then cupping it can be a great way to be sure you're getting the best out of it.
What you'll need:
- Coffee! Ground coarse.
- A kettle or some way of boiling water.
- A scale.
- A timer.
- A small bowl or cup. You can get specially made cupping bowls, but they're not essential. Any ~8oz bowl or cup works great.
- A spoon. Something wide and shallow ideally, as that'll give you the best shot at dialling in your slurp (which we'll get to shortly). Again, it doesn't need to be a special cupping spoon. If you have one already, great! Use that. But you certainly don't need to go and buy one to be able to do this. Any spoon will do.
Step 1
The first step will be to brew up your coffee in your cup or bowl, to a ratio of 1:18. So 1g of coarse ground coffee to 18g of water.
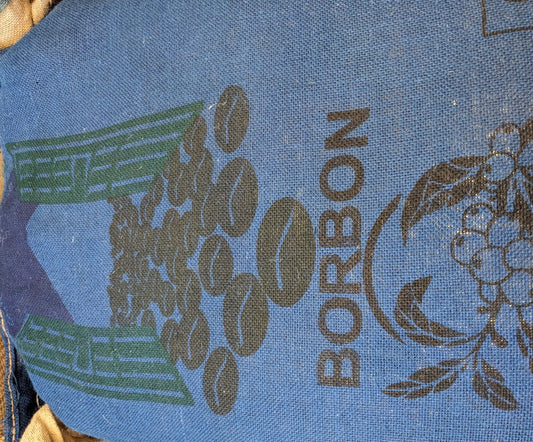
Here's a close up pic to give you an idea of the grind sized we use:

The amount of coffee you use will depend on the size of the cup of bowl you're using.
Make sure you're filling whatever brewing vessel you're using all the way to the top. It'll make the next steps of breaking the crust and cleaning the bowl up a lot easier.
Once you start pouring your water in, start a timer.
Quick note on ratios...
Standard SCA cupping protocols call for a ratio of 1:18 ground coffee to water.
Before you get started, measure the capacity of your bowl/cup in grams. You want to fill it right to the top so the water is as level with the rim of the vessel without spilling over.
Whatever number you get in grams is the total capacity your cup or bowl can take. And that's the total we want in there when we brew up the cupping.
So take that total capacity weight and divide it by 18, to work out how many grams of ground coffee you'll be using.
Step 2
At 4 minutes, it's time to break the crust.
You might notice that lots of grounds have floated their way to the top of your cup, along with a lot of small bubbles.

If you're cupping a darker roast and/or something super fresh then you might have more of this going on.
If it's an older light coffee that's a few weeks off roast, you'll have less.
Either way, that crust isn't something you wanna be spooning into your mouth.
So step 2 is to break it, release the gasses and aromas locked away underneath, and then clean up the bowls to get them ready for tasting.
Take your spoon and push it front to back along the top of the crust 3 times.
This will agitate the brew slightly and most of those grounds locked up in the gasses at the top will sink to the bottom, out of the way.
As you're doing this, try and get your nose as close to the bowl as you can, without your nose getting wet.
... sorry... Boosh tangent.
Back to cupping.
Now that most of the grounds have settled, you'll be left with a few stragglers floating on top.
Take your spoon, and clean those out.
I like to have another, empty, bowl on hand to scoop the grounds into, and a rinse cup of clean water to rinse the spoons inbetween.
Ideally, if you have 2 desert style spoons, you can sweep them in tandem together from the back of the cup to the front, and clean up all the floaty bits in one clean move. Try to make a pincer kinda movement where you sweep the full width of the surface with the 2 spoons.

But that takes a bit of practice, so don't worry if you're having to take a couple of runs at it.
The main thing here is to clean up the surface so that you're ready to start taking spoonful's of coffee to taste in a few more minutes time.
Step 3
Finally, it's time to taste!
You can pretty much do this any time after breaking the crust, but I'd recommend waiting until at least 11 minutes. Ideally more like 13-15.
That'll give the brew a chance to cool down slightly so that you don't burn your pallet and also to give all of the flavours a chance to come out properly.
A lot of the good stuff we're trying to taste for when we cup coffee probably wont be very pronounced when the brew is still too hot. So, be patient.
Step 4
Ahh...the slurp.
Few things in coffee are as divisive as the slurp.
Experimental processing techniques might just have the edge on it right now, but it's a close call.
For every slurper, there's a misophoniac partner running for the door.
But do we need to slurp? Is it essential?
Not really, no.
The point of the slurp is to:
- Aerate the coffee
- Spray the coffee over your full mouth, covering all areas of your pallet
Remember, different areas of your tongue and mouth are better at picking up on certain aspects of flavour.
The sides of your tongue for example, are where you'll experience sourness and acidity.
Sweetness will be experienced more towards the front of your pallet.
And bitterness is mostly concentrated towards the back of your mouth.
With a good slurp, you can evenly cover your whole pallet with coffee at the same time, and therefore make it easier to pick up on the nuanced characteristics of the coffee and hone in on those aspects of flavour that make a coffee what it is.
Here's some vintage early Lance, with the scoop on the slurp:
It takes some practice to hone in a good slurp, but the important thing as always is just to have fun and experience the coffee.
No matter what your slurp style, getting the full flavour of what's in your coffee is just about making sure the coffee coats all areas of your pallet.
As long as you do that, your slurp's right on track.
Wrapping up
So there you go!
That's all of it.
Now you know how to cup coffee at home!
So dig out all of those old bags "not quite enough left for a brew" coffees and get to having some fun practicing cupping.
Extra tips for cupping coffee at home
1. Use multiple cups
I'd highly recommend cupping at least 2 different coffees side by side, whenever possible.
It's much easier to pin down your thoughts on what you're tasting when you have something else next to it to refer and contrast to.
2. Have fun!
Coffee should always be fun, otherwise, what's the point.
So don't stress if you cant find the precise flavour notes that the roaster put on your bag.
Their frame of reference is personal to them and different to yours anyway, so there's a good chance that you will indeed experience the same coffee differently.
If you're starting out cupping coffees for the first time, focus on simply: do I like this coffee? do a prefer coffee a or b?
Then you can move onto why do I prefer b or a or z? Is it sweeter? More acidic? Fruitier? Does it feel fuller/thicker/have more body?
When you start to dig into more granular flavour notes... start broad, and work your way in. Is it fruity? Chocolatey? Nutty?
Then you can think about what category of fruits? Is it stone fruits? Berries? Citrus fruits?
From there, with practice, you can start to think about what type of berries, or citrus or whatever else you came up with. But that takes practice. So give yourself a break on it if you're struggling and focus on one level broader.
Cheers and happy cupping!
P.S. Our coffee sample bags are a great way to get your hands on small amounts of lots of different coffees. Just right for cupping practice.